Tables in DOCX templates
AutomatedDocs enables you to generate detailed tables from templates with minimal syntax. These templates allow you to reference properties within simple objects, collections, and even nested structures. Below are a few examples to demonstrate this capability.
Tables
To incorporate tables into your document, simply insert the appropriate tags or fields as shown in the examples below.
Example of Table Formatting
Here’s how a document formatted with table tags looks:

This format will generate a table like the following:

Based on a JSON object structured as:
{
    "item": [
        "bullet one",
        "bullet two"
    ],
    "table": [
        {
            "name": "Conrado",
            "last_name": "Mag",
            "nick_name": "Conra"
        },
             {
            "name": "Juan",
            "last_name": "Argento",
            "nick_name": "Pepe"
        },
             {
            "name": "John",
            "last_name": "Doe",
            "nick_name": "Johnny"
        }
    ]
}
Tables from Google Sheets
AutomatedDocs can efficiently organize data from your source spreadsheet into tables within your document. This functionality is particularly beneficial when your spreadsheet contains multiple rows that should be grouped into a single table, such as in invoice templates or purchase orders.
Data Grouping Feature
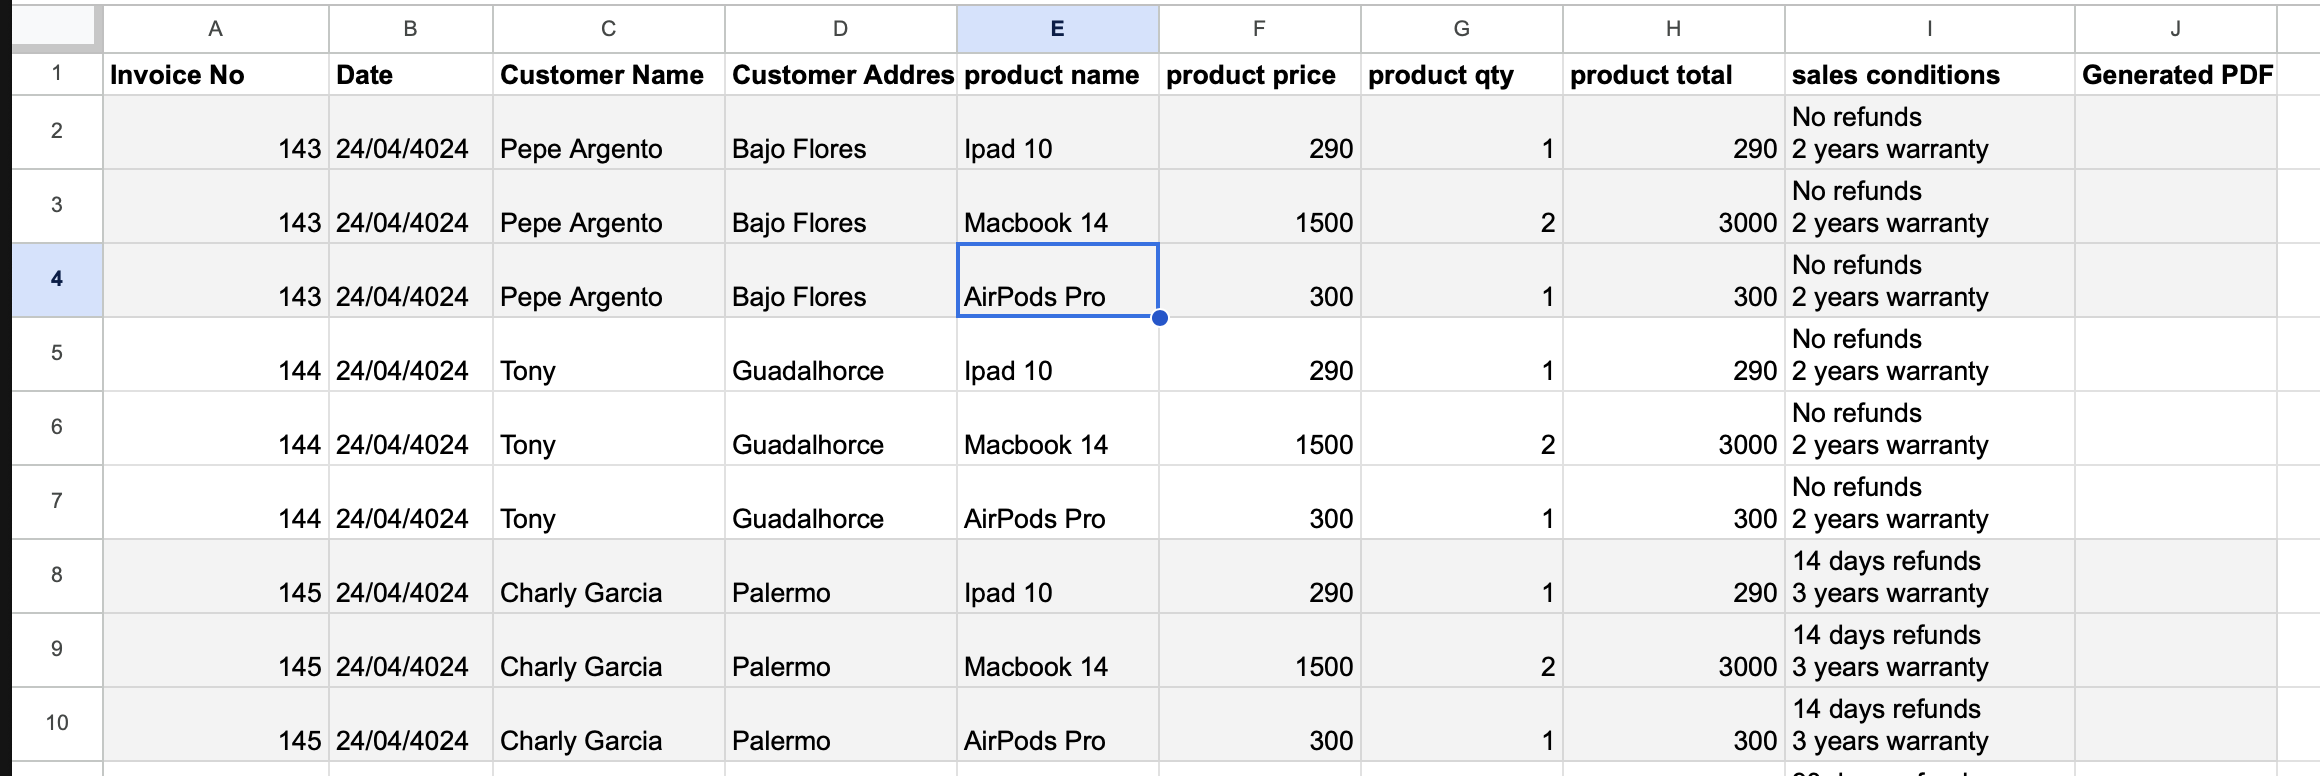
If you plan to use this feature, ensure your source spreadsheet is organized with rows that can be logically grouped. Below is an example of how rows might be organized:

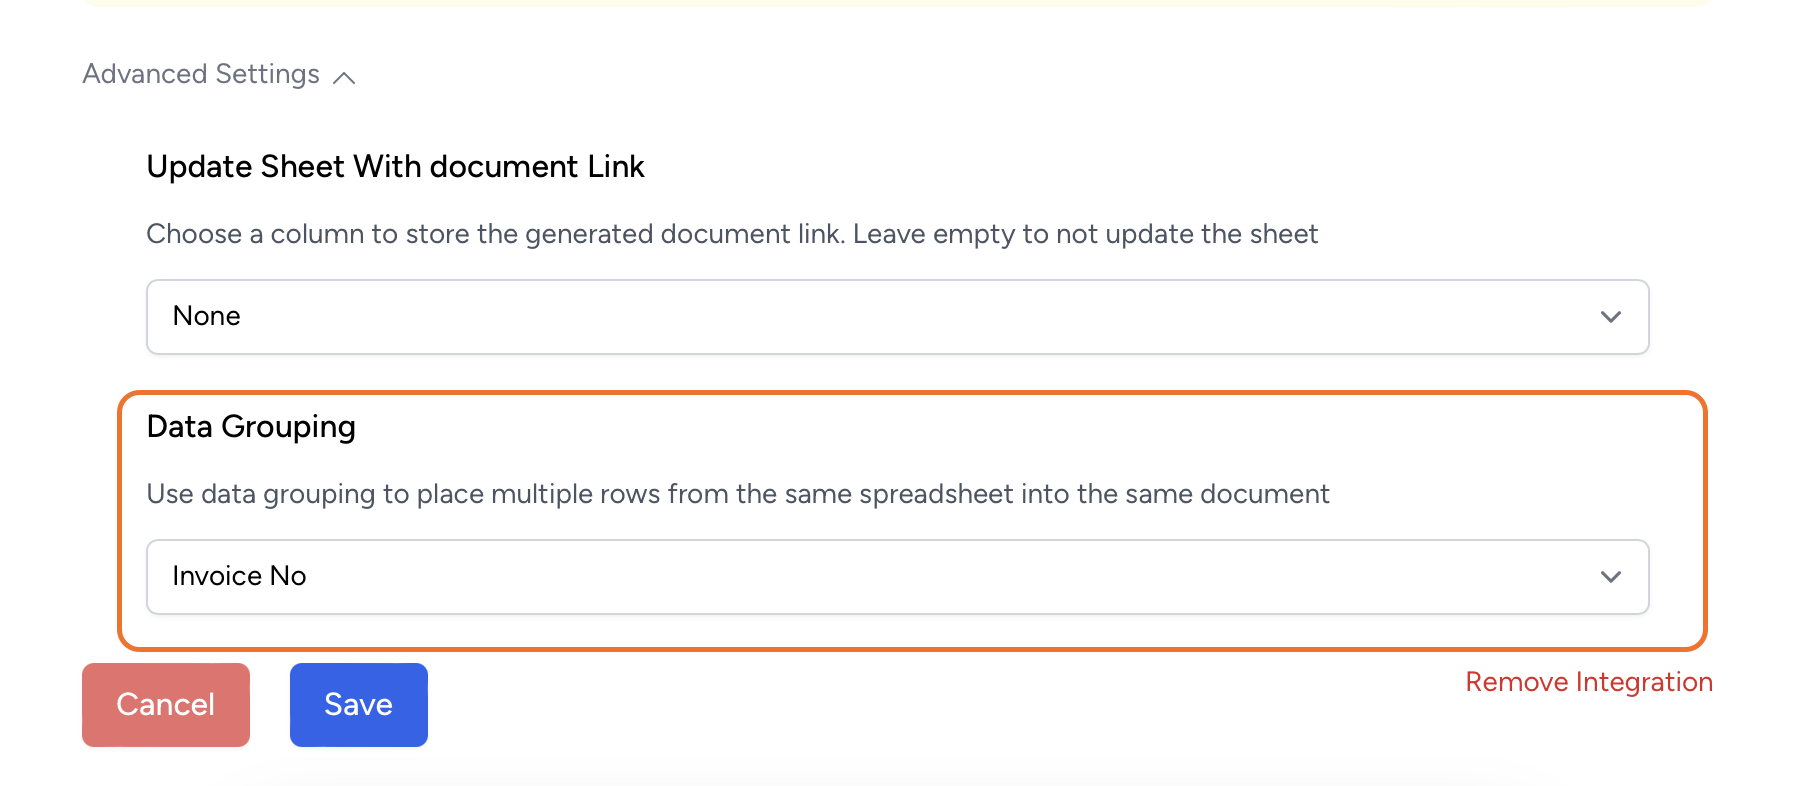
The Google Sheets Integration includes a "Data Grouping" feature that allows you to select a column to use for grouping your data.

Ensure the column chosen for grouping is unique to avoid duplicates (e.g., avoid having columns named both 'Invoice Number' and 'Invoice No.' with identical data).
Once you select the grouping column, the rows will be organized into a table in your document as shown below:
