Google Drive Integration
AutomatedDocs offers a seamless integration with Google Drive, allowing your generated documents to be automatically uploaded to a folder of your choice. This guide will help you through the process of selecting a target folder in Google Drive for storing all newly created documents.
Connect Your Google Account
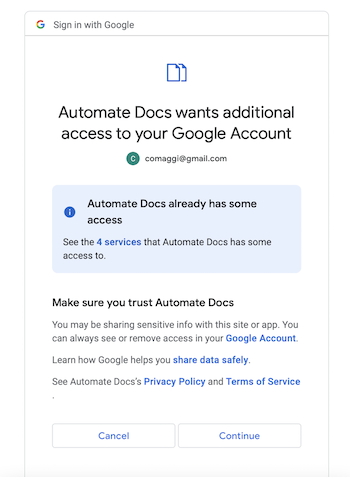
Begin by linking your Google account to AutomatedDocs. Click "Connect Google Account" and follow the steps to authenticate your account.

Google will request you to grant AutomatedDocs certain permissions needed for operation. After reviewing these permissions, click "Allow" to provide AutomatedDocs access to the designated folders in your Google Drive for document storage.

Note: AutomatedDocs asks for limited access to your Google Drive, specifically to the files and folders you designate for use with our platform. We do not access your entire Drive, ensuring your privacy and control over your files.
Setting Up Your Google Drive Integration
With your account connected, the next step is to choose the Google Drive folder where the generated documents will be uploaded.
Access Google Drive Folder Selection
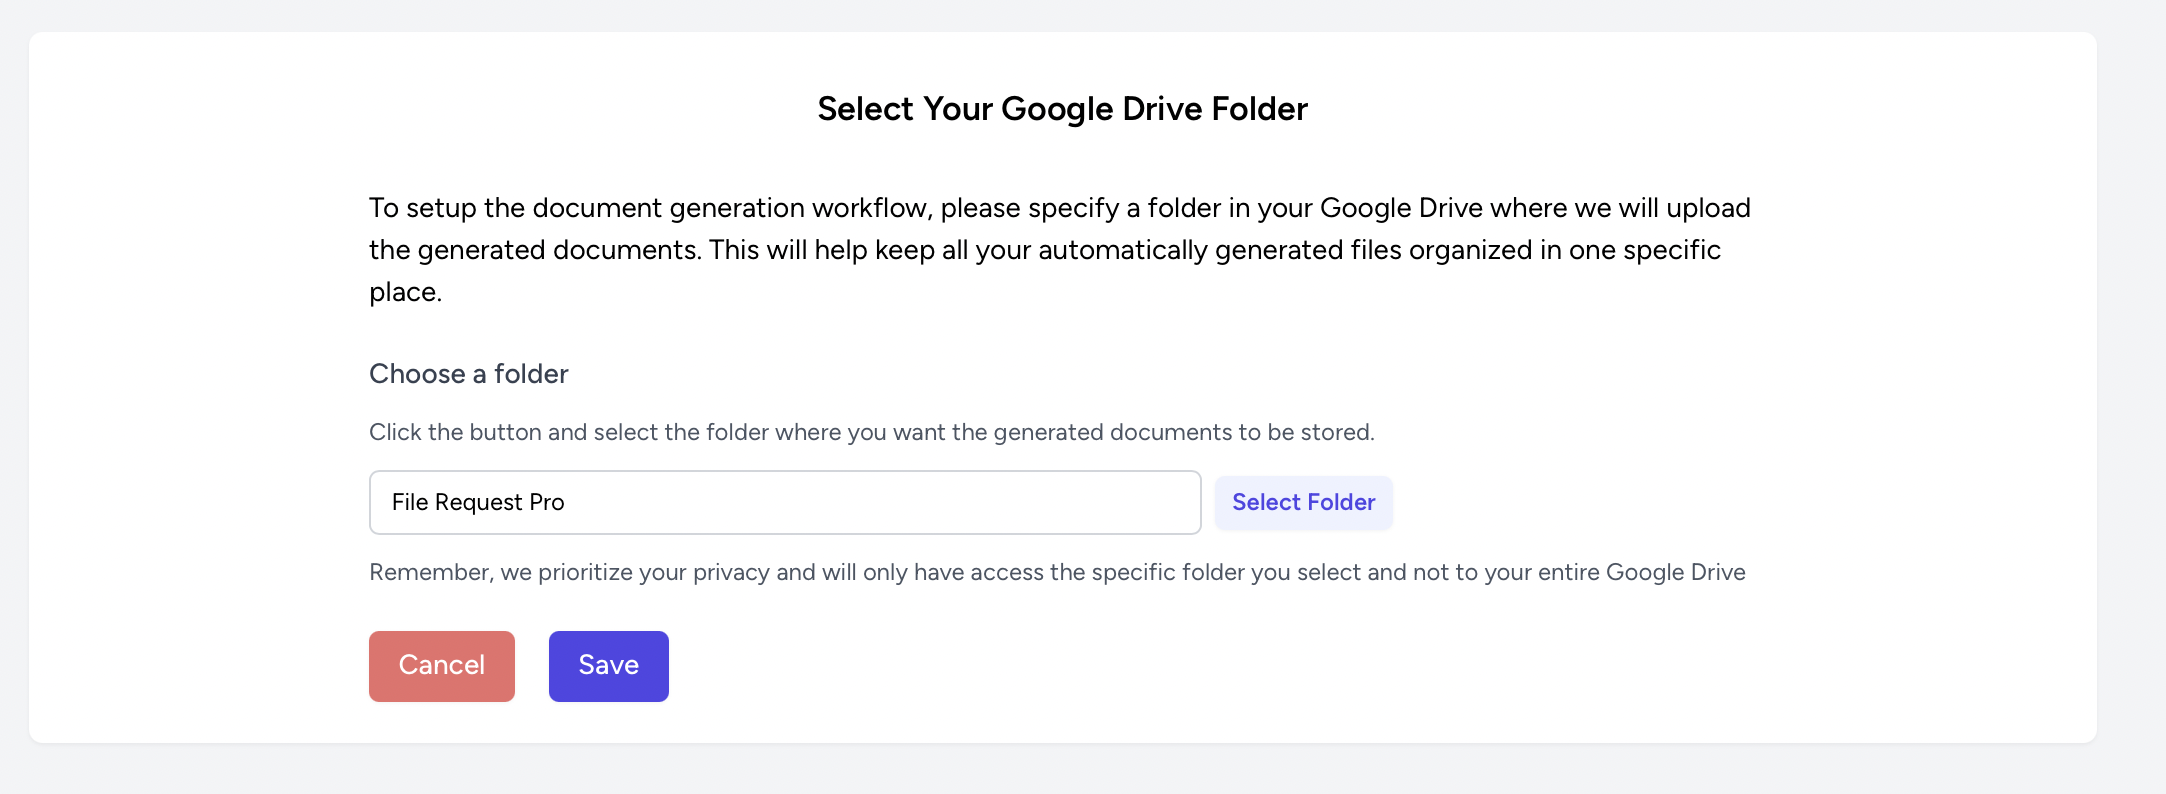
At the Google Drive integration screen:

- An option to "Choose a folder" will be presented for your generated documents.
Specify Target Folder
To select the target folder:
- Click "Select Folder".
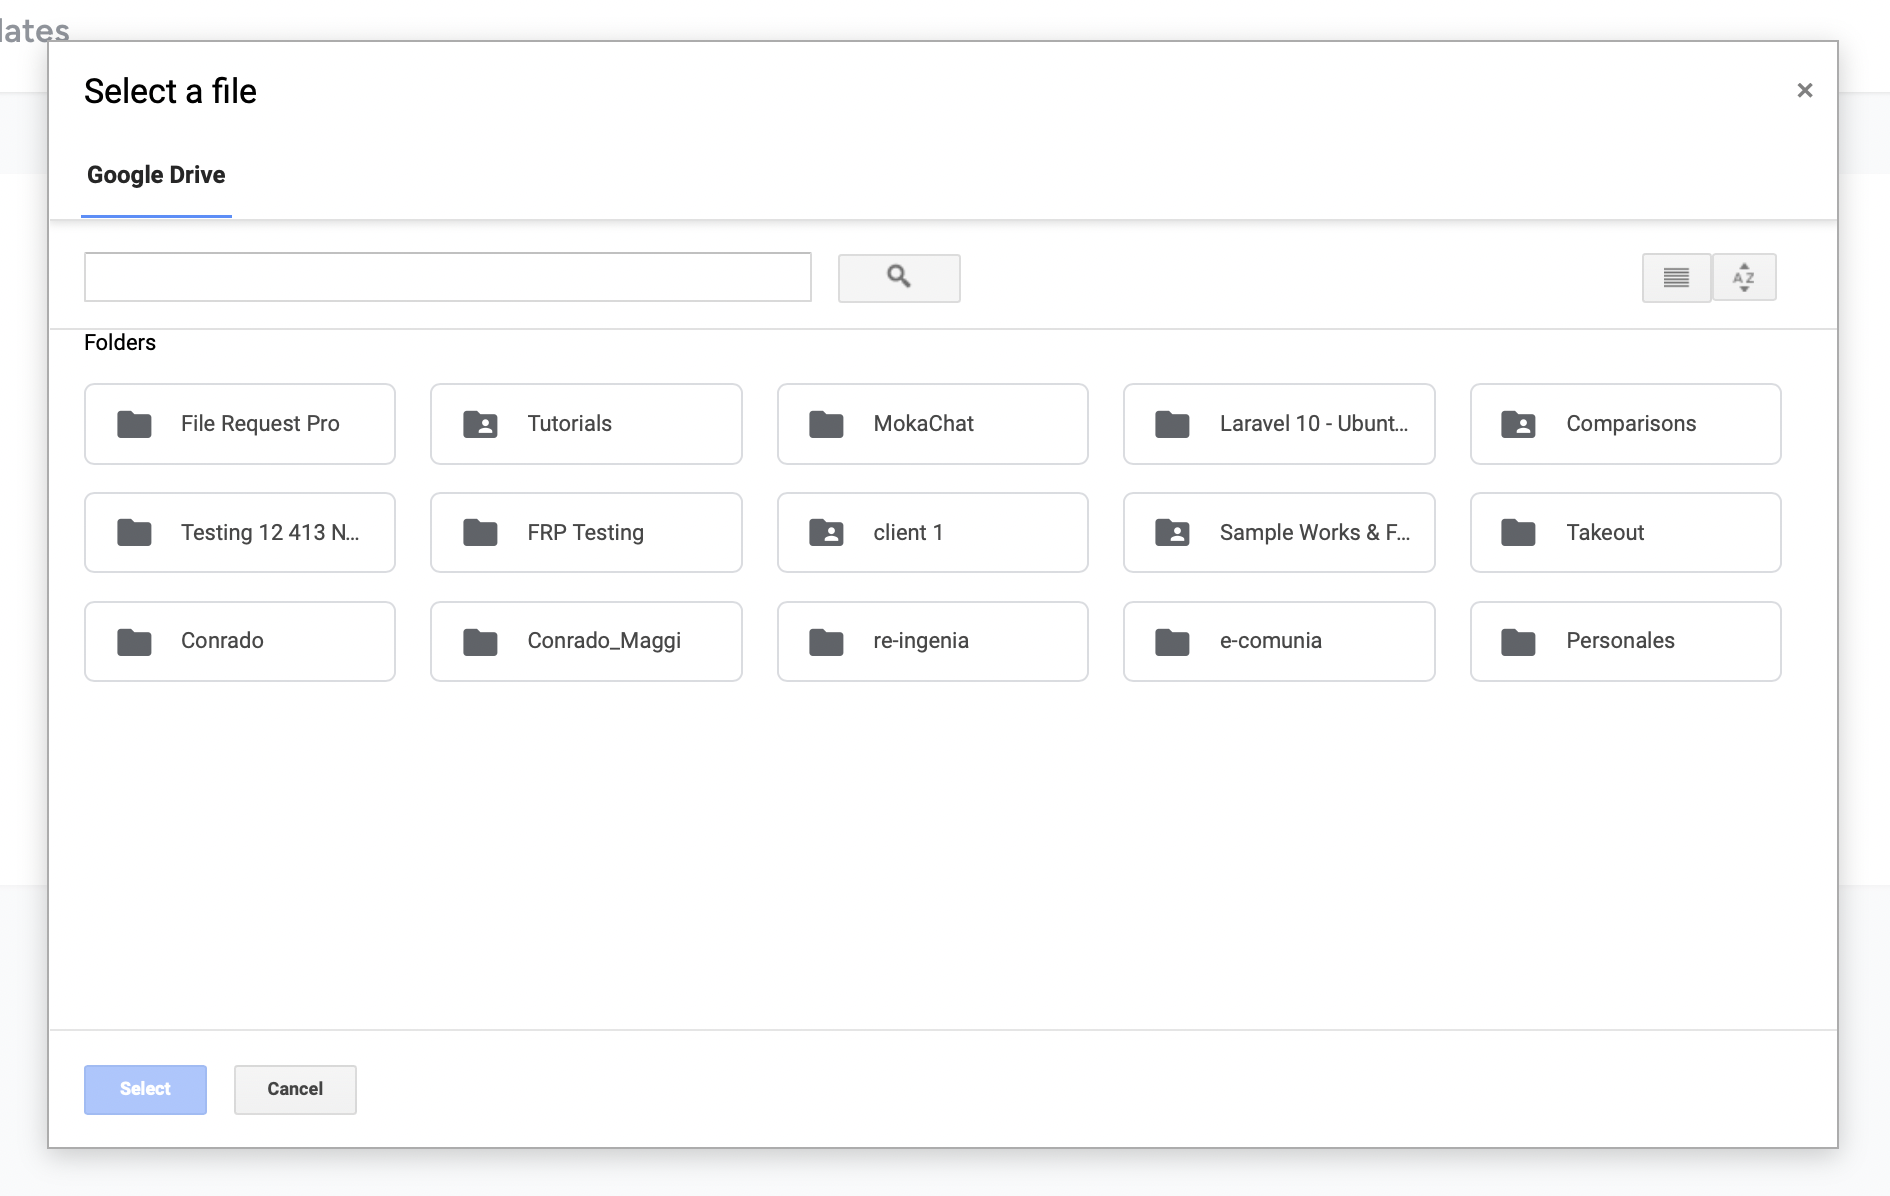
- A prompt to log into your Google account will appear if you're not already signed in.
- Navigate to and select the desired folder in your Google Drive where you want the documents saved.

Confirm and Save
Once the target folder is selected:
- Ensure it's the correct location for your documents.
- Click "Save" to confirm your folder choice and finalize the integration with Google Drive.
Privacy and Security
- Your privacy and security are paramount to AutomatedDocs. Access is limited to only the folder you've selected, safeguarding the rest of your Google Drive contents.
- The permissions granted are exclusively for storing the generated documents in your chosen folder.