Webhooks Integration
Webhook Configuration for Document Generation
Webhooks provide a powerful way to automate document creation by allowing external applications to trigger actions within our system. By configuring a webhook, you can set up an automated workflow that creates a new document every time a POST request is sent to your unique webhook URL with the required JSON payload.
This guide will help you understand how to use your webhook for seamless document generation.
Step 1: Obtain Your Unique Webhook URL
You will be provided with a unique URL that our system will monitor for incoming POST requests:
- Locate the "Your Unique Webhook URL" section on the Webhook Configuration screen.
- Copy the provided URL to your clipboard.
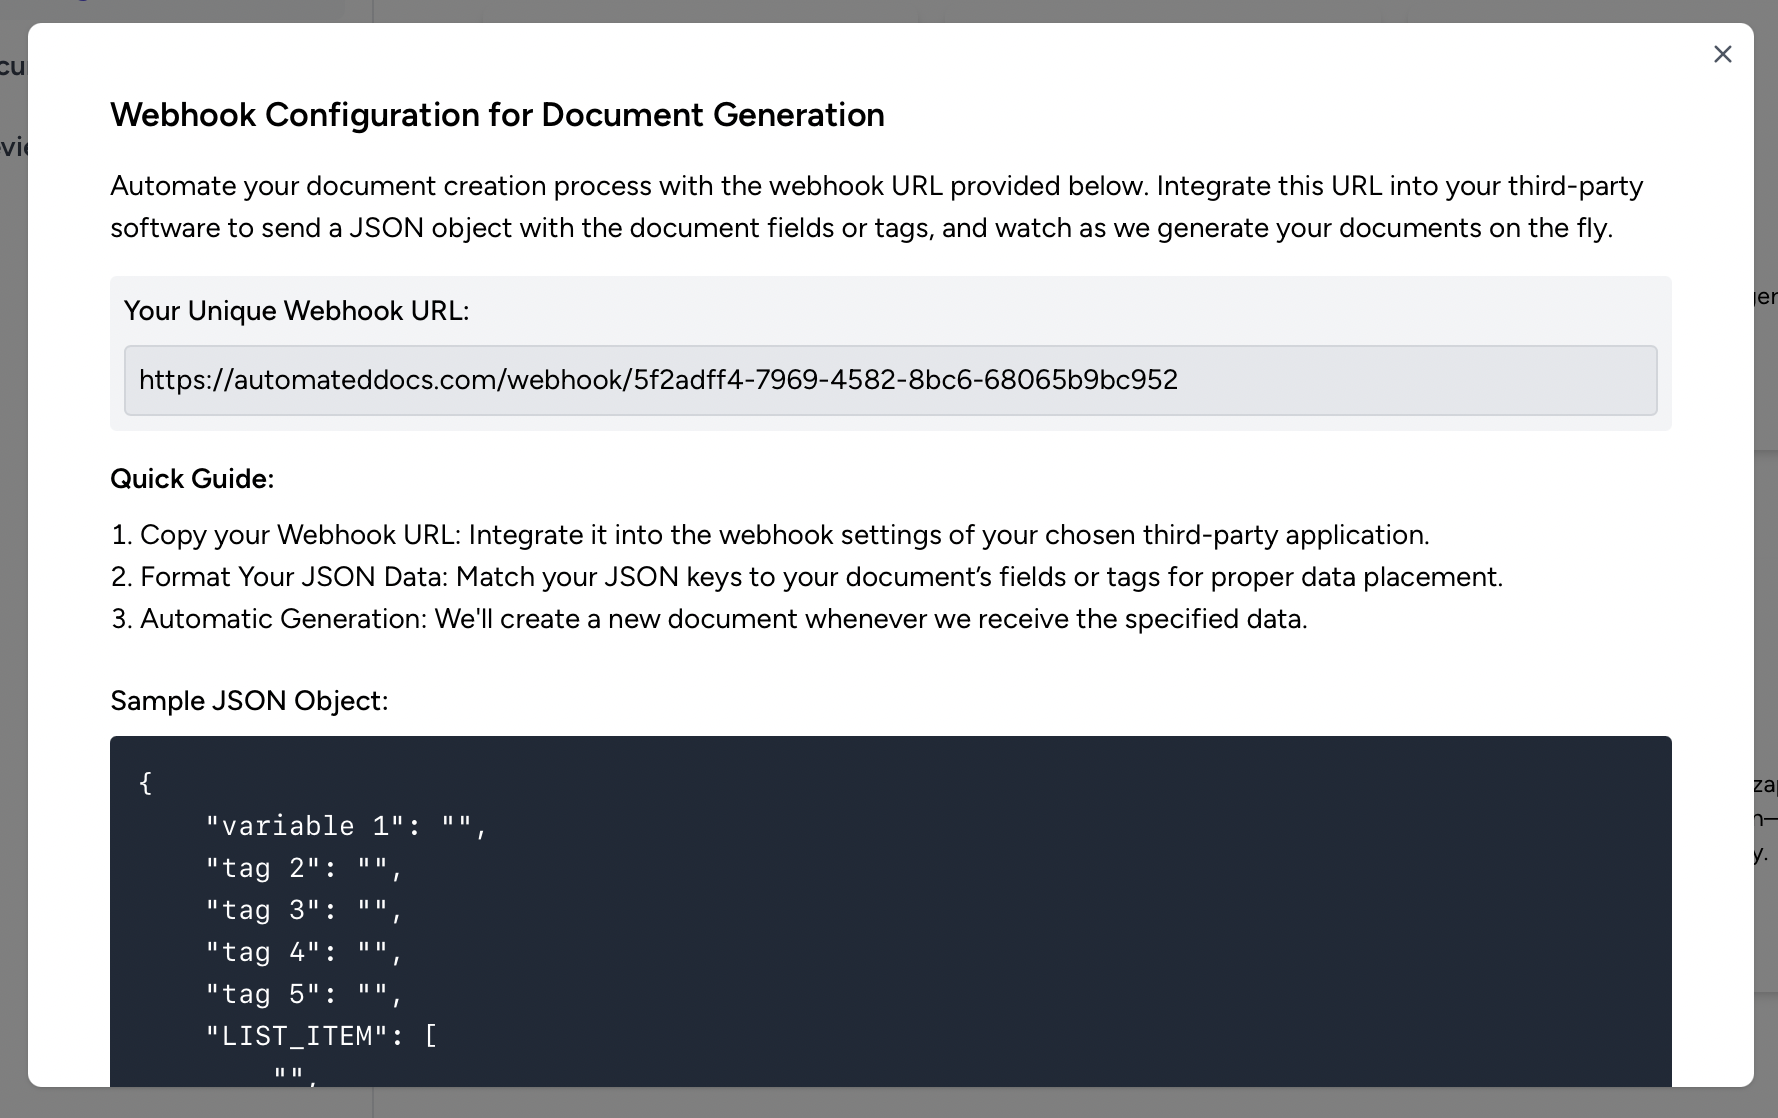
This URL is specific to your account and will be the endpoint that receives the JSON data to generate documents.
Step 2: Integrate Webhook into Third-Party Application
After copying your unique webhook URL:
- Paste the URL into the webhook settings of the third-party application or service you want to integrate with.
- Ensure that the third-party service is configured to send POST requests to this URL with the JSON data structured as required.
Step 3: Format Your JSON Data
To successfully create documents, the JSON keys must match the fields or tags defined in your document template:
- Refer to the "Sample JSON Object" displayed on the Webhook Configuration screen as a guide.
- Structure your JSON payload to match this format, where each key corresponds to a specific field or tag in your template, and the values are the data you want to populate in the document.
Example:
{
  "variable 1": "Value for variable 1",
  "tag 2": "Value for tag 2",
  "tag 3": "Value for tag 3",
  "tag 4": "Value for tag 4",
  "tag 5": "Value for tag 5",
  "LIST_ITEM": ["List item 1", "List item 2"]
}
Troubleshooting and Support
If you encounter any issues or have questions about configuring your webhook:
- Review the integration settings in the third-party application to confirm that the webhook URL and JSON data are correctly set up.
- Consult our help resources or reach out to our support team for assistance with troubleshooting any webhook-related problems.
Configuring Your Webhook Endpoint for Document Delivery
To facilitate real-time delivery of generated documents, AutomatedDocs allows you to set up a webhook endpoint. Each time a document is created, we will send a POST request to your specified endpoint containing a JSON object with the document's download URL. This guide explains how to configure your webhook endpoint for seamless document delivery.
Step 1: Enter Your Webhook Endpoint URL
To begin the setup:
- Locate the field labeled "Enter Your Webhook Endpoint URL."
- Input the full URL of the webhook endpoint provided by your server or third-party service where you wish to receive notifications of generated documents.
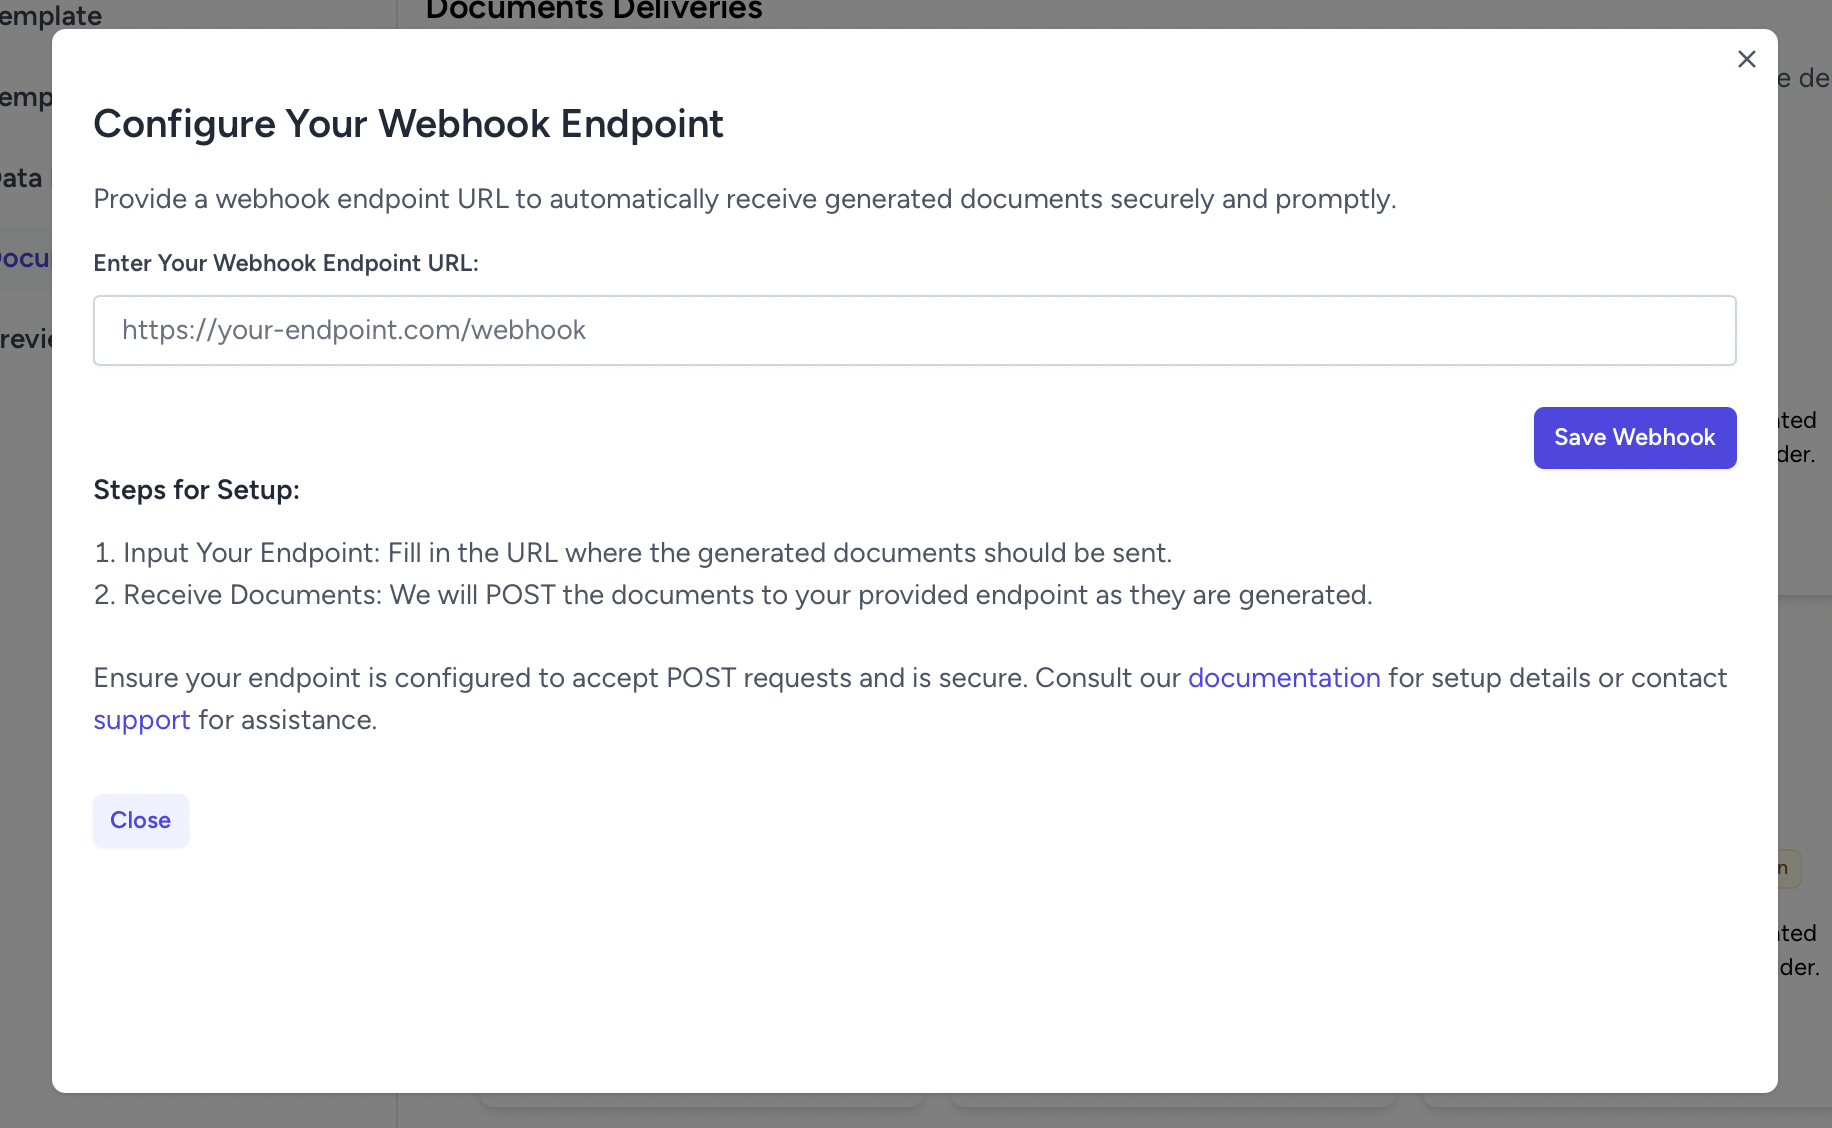
Step 2: Save Your Webhook Configuration
Once you have entered your endpoint URL:
- Click on the "Save Webhook" button to save the configuration.
- This action will register your endpoint with AutomatedDocs and enable document delivery notifications.
By integrating a webhook endpoint with AutomatedDocs, you create an efficient and automated system for receiving your generated documents instantly, enhancing your workflow and productivity.